

This guide is intended to help my customers who are just starting out with computer networking. Samba is file sharing software. Samba client allows your computer to use files on a remote computer. Samba server allows sharing your files with users on remote computers.
This page describes how to configure Samba server. ArcaOS includes ArcaMapper to provide a user interface for Samba client. Here is link to a web page decribing how to configure Arca Mapper.
ArcaMapperEach computer in your network will be connected, via ethernet cable or via WiFi, to your network's router. Each computer will need to have a working TCP/IP network connection. You probably already have this so you can use e-mail and the web browser.
The SAMBA server installed by ArcaOS has a defective program that prevents properly adding users. I work around this problem by restoring a good set of users and groups from a backup.
For my own use, I restore my SAMBA users and groups from a backup. I use the Suntan Special apps, SambaConfig, SambaBackup and SambaRestore for these purposes.
I use the SambaRestore app to install the users and groups from a standard Factory build of a Blonde Guy computer. This is suitable for the user of a Blonde Guy computer to start using SAMBA server.
The first step is to replace the defective users and groups list from ArcaOS. Select the sambaRestore app and press install.
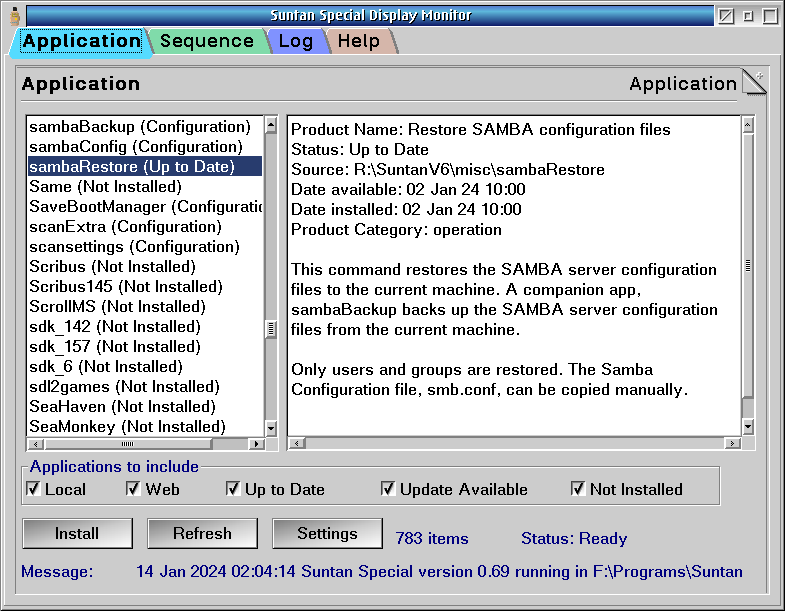
Long time users can apply their previous Samba Backup. First time users can install Samba-Factory.
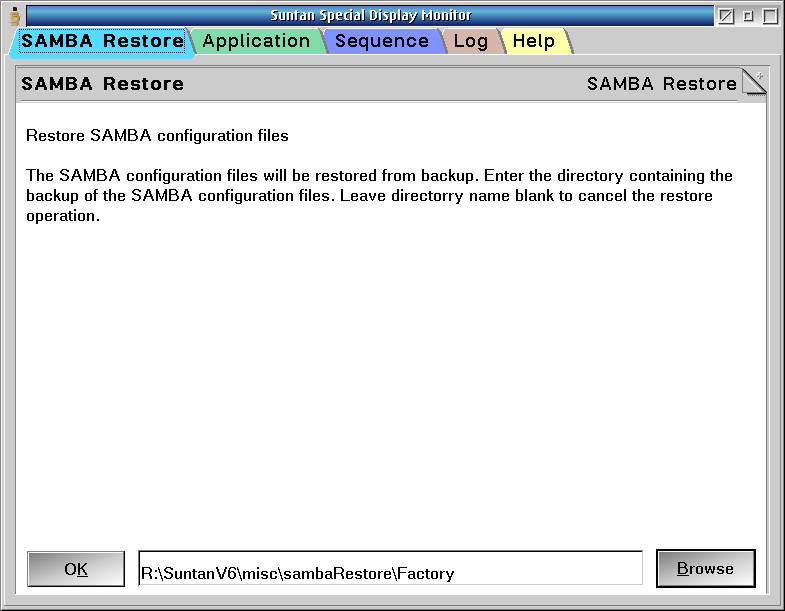
SambaRestore stops Samba, replaces users and groups, then then starts Samba. Once it has done its work, Samba is ready to configure.
Richard Dunkle explains how to enter users with the kLIBC User Manager and smbpasswd.exe in this article.
https://www.os2world.com/wiki/index.php/Basic_Install_of_Samba_Server_1.3_on_ArcaOSHis procedure no longer works with the SAMBA installed by ArcaOS.
The SambaConfig app on Suntan Special creates a samba configuration that is suitable to share your computer's files.
First, complete the installation process by running the Simple Samba Configuration Center. Ensure that the Installation mode screen check boxes to Erase current smb.conf and create a new one, and Install libraries using YUM are checked. After pressing continue, wait for the next Installation mode screen.
On the next Installation mode screen, check the boxes for Do not create root account, for tdbsam and for standalone controller. Enter a workgroup name. Blonde Guy computers are in the Beach2 workgroup. Press the Create Samba default default configuration button. (The word default appears twice on the button.)
One last thing that is needed to make this work with newer clients. Edit the smb.conf file, and ensure that these two parameters are set.
Save and exit. Reboot to activate changes.
The samba programs, which are called daemons, must be running to share files. The daemons can be started and stopped manually from icons in the Samba folder.
An easy way to have samba running all the time is to create a shadow of the Start Samba server icon in the startup folder.
A more sophisticated way to start the samba daemons is to create/modify \tcpip\bin\tcpexit.cmd to call smb 'start'.
Open the Samba Folder and find and start the Simple SAMBA Configuration Center.
The first time the Simple SAMBA Configuration starts it will start in install mode. On subsequent invocations Simple Samba Configuration Center will display the system configuration. You will see all the basic parameters and a list of shared resources.
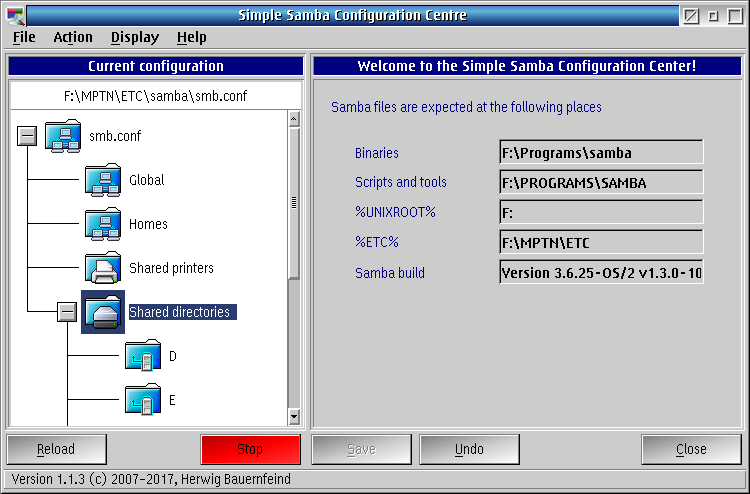
Close the two programs above and open Samba Status Monitor. You should see both smbd.exe and nmd.exe running. If not, it is time for some troubleshooting.
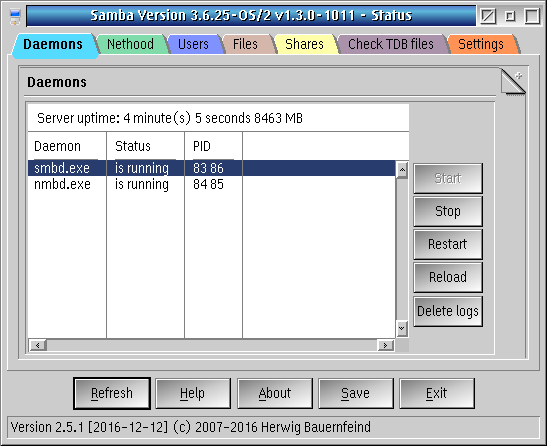
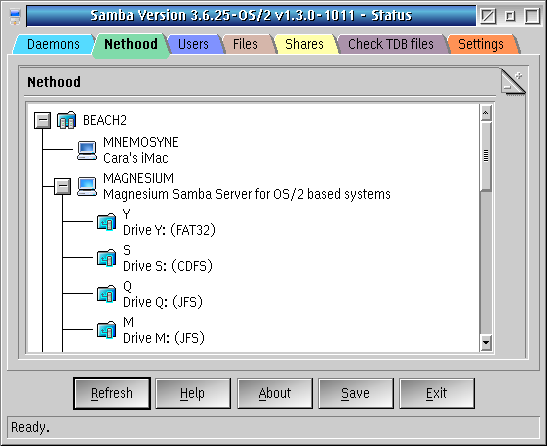
If they are running, look, and you should see your computer on the Nethood tab. Expanding the tree view, you should see all your shared resources. If so, the server is ready to use. To share files at system startup time, place a copy of the Samba Start icon in the system's Startup folder.
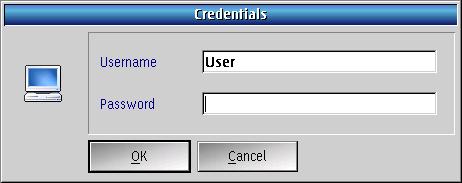
Open Samba Users and Groups, and you will see the Credentials dialog. The default user on the system is User. The name of the default user is stored in the USER environment variable. Enter the correct password (the default password is Password).
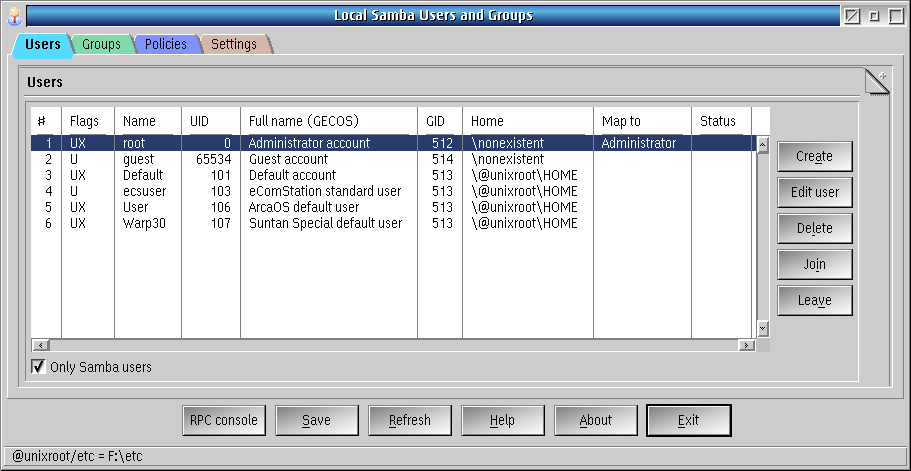
The Local Samba Users and Groups dialog displays all users, Samba and otherwise. Check the box to display only Samba Users. Notice the user named User. You can create your own users, but for now, User is our example. You can (and should) change the passwords on all users after you get the basic file sharing to work.
I have just scratched the surface of Samba for OS/2 in this article. There is a lot more material to cover, particularly if you want to interface more computers running different operating systems.