

With the new computer configured as the server, it is now time to configure the other computers as clients. Once configured, you can copy all your accumulated files from the old computer(s) to the new one.
Samba client went through a user interface change for ArcaOS 5.1. If you are using ArcaOS 5.0.x, skip ahead to the next section.
If you are using ArcaOS 5.1.x, open the ArcaMapper Network Connections folder. The ArcaMapper folder is in the Network folder.

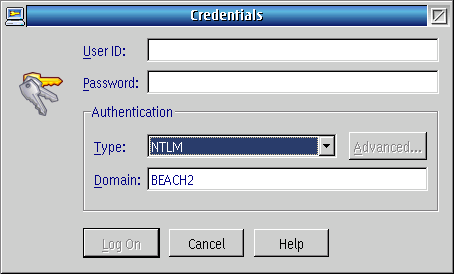
Before browsing the network neighborhood, open Logon (New Credentials) in order to browse the network. The type will be NTLM unless you are using Active Directory, in which case you will be using kerberos.
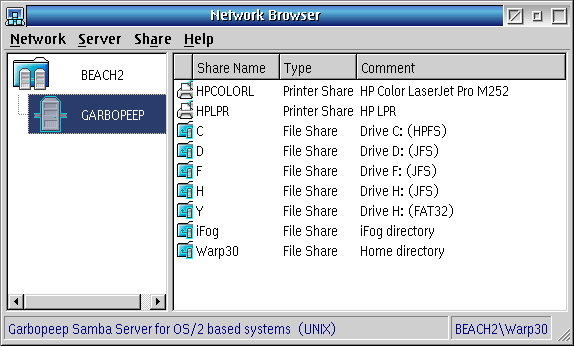
Open the Network Browser. You should see your domain and server. Select the server, and you can view its shared resources in the right hand window.
To assign one of them a drive letter, right click on it and select "Connect...".

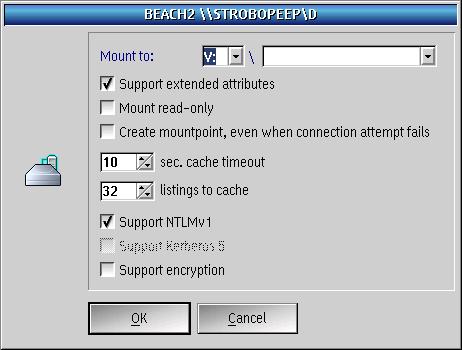
In this case the server shared drive D: will be mounted on the local machine as drive V: Encryption is not enabled, but NTLMv1 is. Extended attributes are supported, and I will save the connection for furture use. These are the settings I use to connect to Samba Server running on ArcaOS 5.1.
If you are using ArcaOS 5.0.x, start ArcaMapper Connections. Select Network Neighborhood and find your Samba Server. Expand the computer to see the shared resources. To assign one of them a drive letter, right click on it and select "mount". In this case the server shared drive D: will be mounted on the local machine as drive V:.
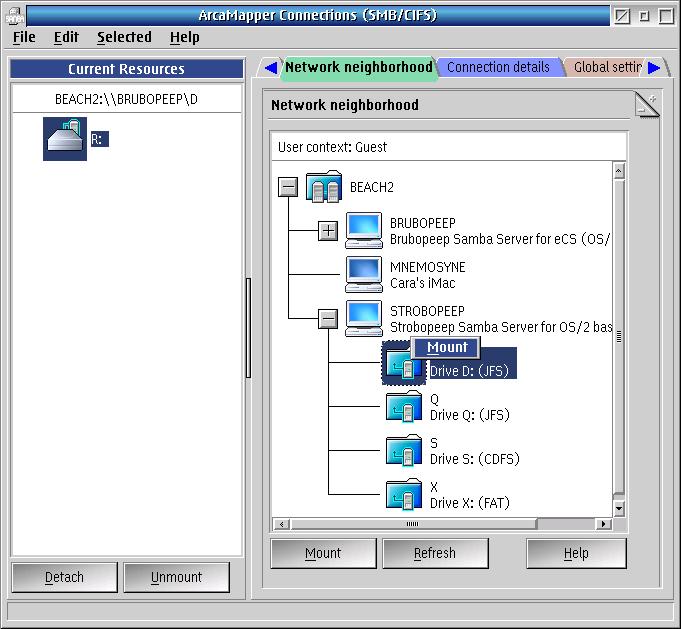
A dialog will let you set drive letter and optionally the directory to be the mount point for the resource.
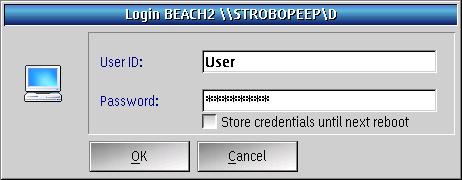
Enter the userid and password, which are "User" and "Password" in our default configuration. You should select more secure passwords after getting networking operational.
Starting with ArcaOS 5.0.5, Samba client connections are persistent, which means you do not need to set items in the startup folder.
Connecting to Samba Server is roughly the same for eComStation users as it is for ArcaOS users. To start, open the Local Network folder and start File and Directory Connections. Select the Network Neighborhood tab and you should see your Samba Server in the list of connections. If not, then time for some troubleshooting.
Navigate the list of connections to the resource you would like to use, right click on it and select Mount. Pick an appropriate drive letter for the resource and leave the rest of the fields alone. Enter the User and Password on the next page, and then the resource should be mounted.
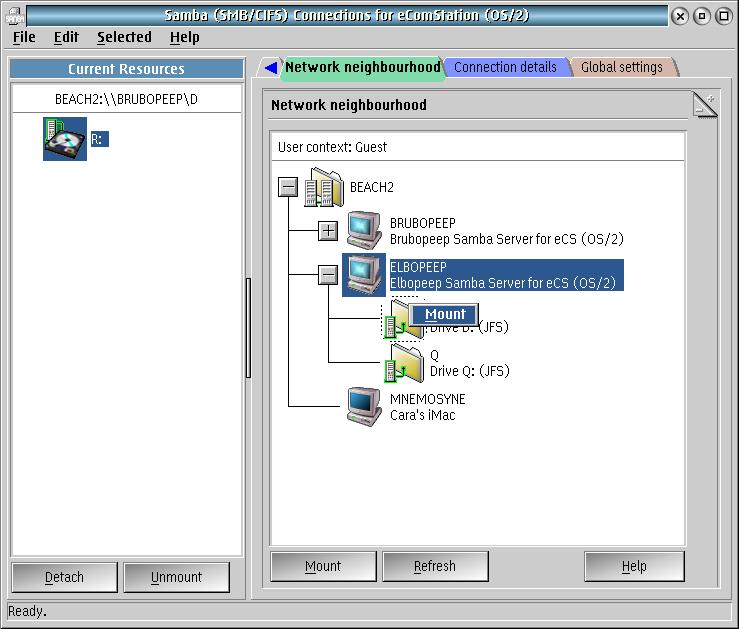
After making sure you can read and write to the new drive letter, save the profile of connections (File->Save...) so you can use it again. The Profile contains all of the current connections for your client.
Connecting to Samba Server under OS/2 using NetDrive is left as an exercise for the student.
I have just scratched the surface of Samba for OS/2 in this article. There is a lot more material to cover, particularly if you want to interface more computers running different operating systems.